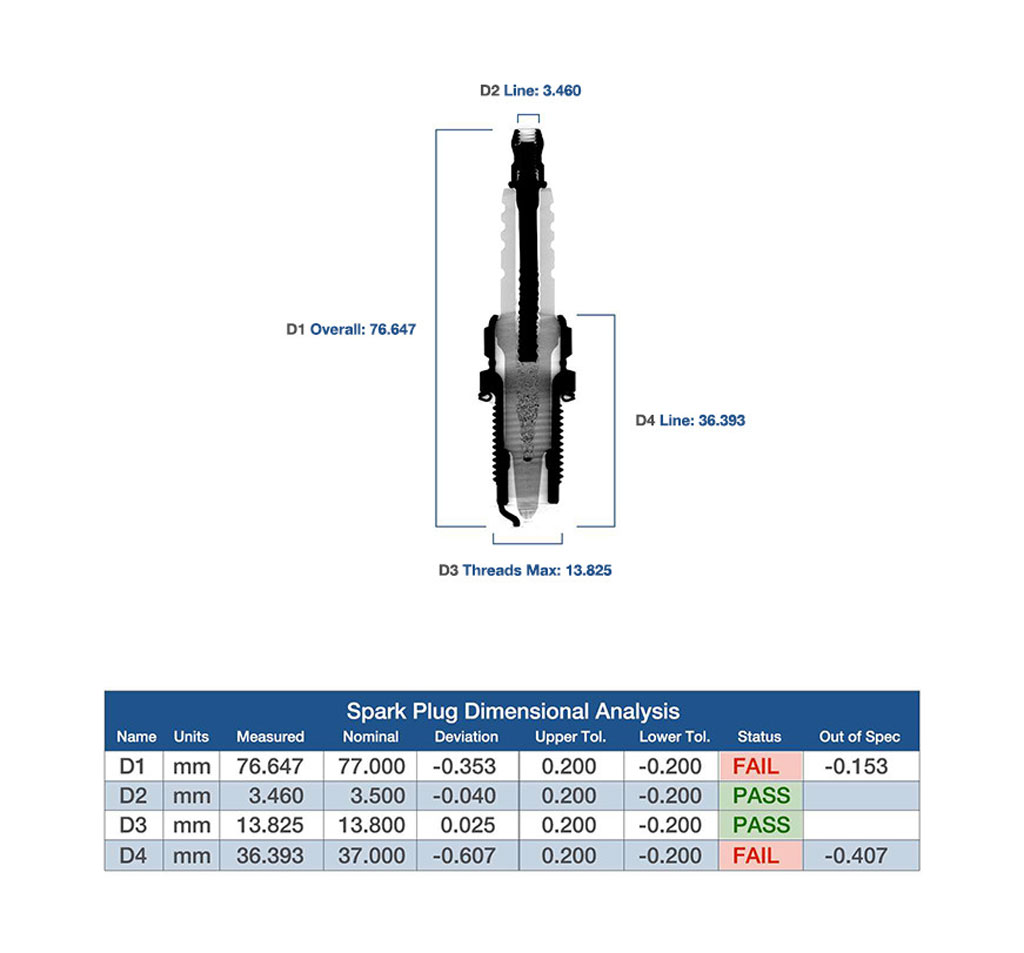
Geometric Dimensioning and Tolerancing (GD&T) is a system for defining part dimensions and tolerances in an explicit way that considers not only the part design, but also its function. We leverage in-house 3D CT Scanning and 3D Laser Scanning to perform GD&T analysis, enabling engineers to compare actual part metrology to desired dimensional specifications. The result: significant reductions in the overall product design and development cycle with higher production quality.
Use of higher-accuracy measurement techniques is allowing various industries to better leverage traditionally complex GD&T callouts such as MMC, LMC, concentricity, surface profile, and run out. This is facilitates increased use of Product Manufacturing Information (PMI) and Model Based Definition (MBD) embedded in 3D CAD models to allow for the reduction or elimination of 2D drawings for documentation and inspection purposes, saving both time and cost. Industrial scanning provides engineers the tools to perform GD&T analysis and validation.
Learn more about GD&T at Wikipedia.

Geometric Dimensioning and Tolerancing specifications for flatness, surface profile and other geometric characteristics, which are difficult to measure using traditional CMM, are quickly and efficiently quantified using industrial CT scans. Once the part is scanned, a high-resolution polygonal model is created by processing the scan data. By repeating this process on multiple parts, a complete GD&T analysis and validation can be obtained, allowing greater understanding of the manufacturing variability that affects your product's quality and performance.
Surface Profile GD&T Verification
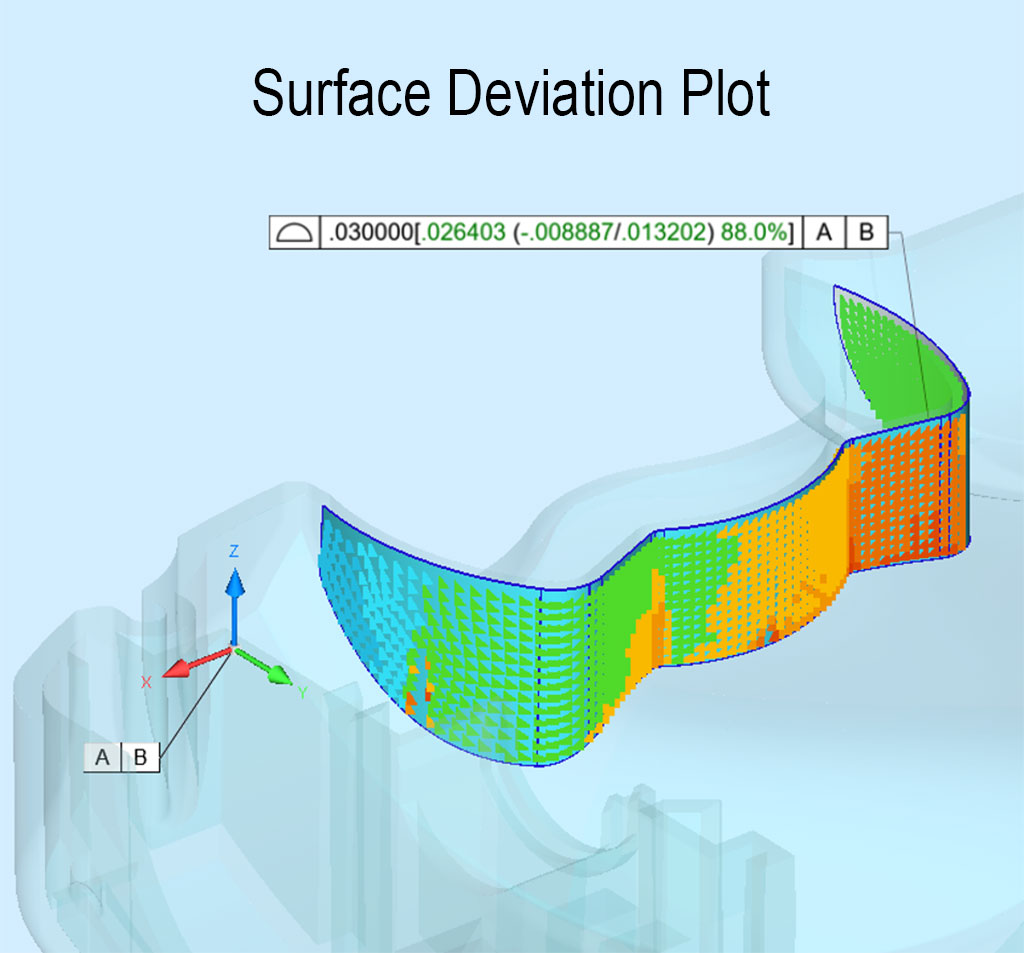
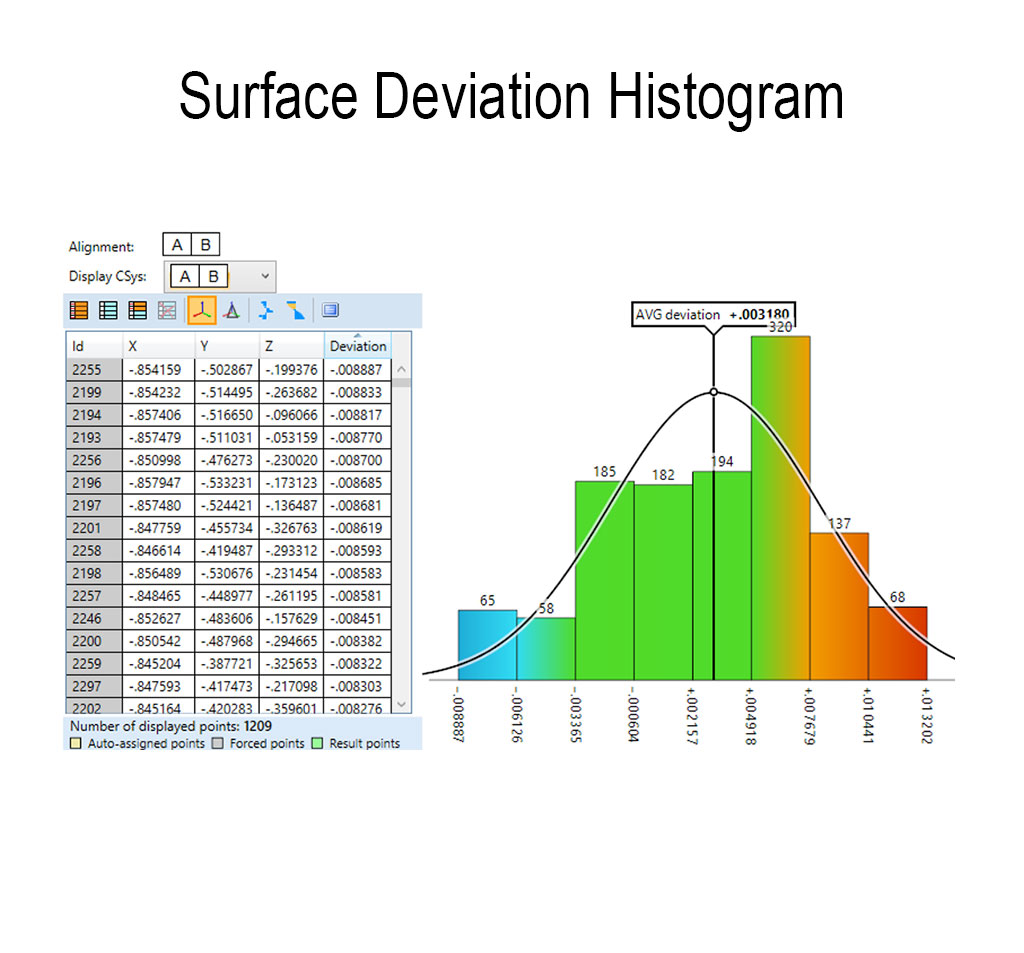
Geometric Dimensioning and Tolerancing (GD&T) surface profile specifications are often extremely difficult and time-consuming to validate using traditional coordinate measuring machines, especially for complex surfaces. In this example a molded device handle designed by our Advanced CAD Services group was CT scanned to create a 3D model with over 3,000,000 data points. Of those, a sub-sample of 30,000 points were used to measure a critical surface profile. Color-coded images and graphical histograms of surface deviation quantified the surface measurements of mold qualification samples as part of Kinetic Vision's First Article Inspection Services.


